Category: Application Notes
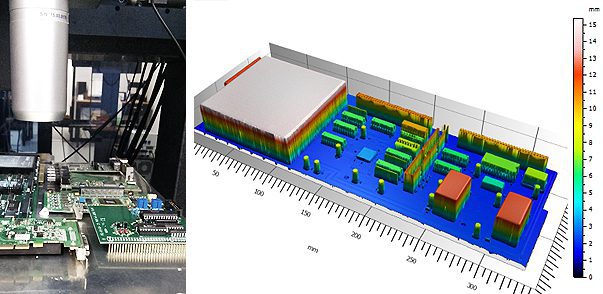
Automated Large Area Profilometry of PCB
Scaling up of manufacturing processes is necessary for industries to grow and keep up with constantly increasing demands. As manufacturing process scales up, the tools used in quality control also need to be scaled up. These tools must be fast to keep up with the production rate, while still maintaining high accuracy to meet product tolerance limits. Here, the Nanovea HS2000 Profilometer, with Line Sensor, showcases its value as a quality control instrument with its fast, automated, and high-resolution large area profilometry capabilities.
Video Clip or App Note: Automated Large Area Profilometry of PCB
Dynamic Mechanical Analysis With Nanoindentation
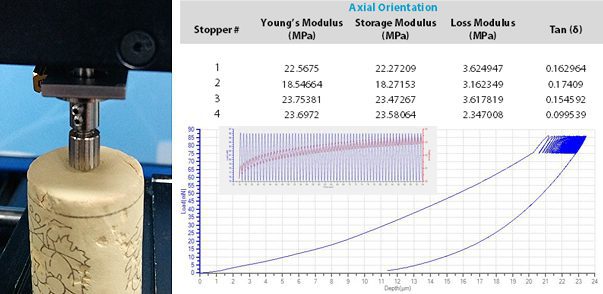
The quality of corks depends heavily on its mechanical and physical property. Its ability to seal wine can be identified as these important factors: flexibility, insulation, resilience, and impermeability to gas and liquids. By conducting dynamic mechanical analysis (DMA) testing, its flexibility and resilience properties can be gauged with a quantifiable method. These properties are characterized with Nanovea Mechanical Tester’s Nanoindentaion in the form of Young’s modulus, storage modulus, loss modulus, and tan delta (tan (δ)). Other data that can be gathered from DMA testing are phase shift, hardness, stress, and strain of the material.
Conchology Topography Measurement Using 3D Profilometry
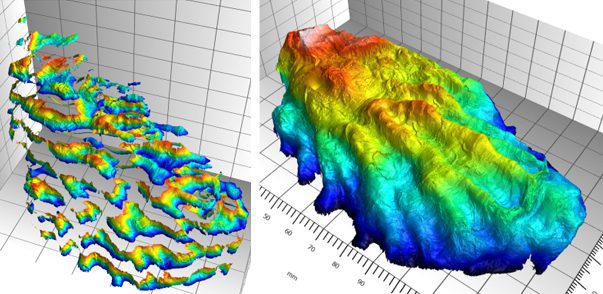
Conchology topography, by scanning the whole surface of an oyster shell, the Nanovea HS2000 Line Sensor will display its ability to work with large samples with abnormal geometries. Reflectivity, transparency, and angles do not affect the data collected with our technology, making 3D Non-Contact Profilometry ideal for all types of samples. Another difficulty that lies with profiling an oyster shell lies in its lack of flat base. Samples typically needs to be securely mounted to the stage to minimize wobbling as the stage move. This usually requires additional sample preparation or fixtures to be used. The smooth air bearing stages on the Nanovea HS2000 Line Sensor, however, drastically minimizes stage noise. Its motorized control of the x, y, and z stages also allows for ease in extending varying height measurement. The extended measurement shown in this study, allows our instrument to capture a full surface that is beyond its pen height range limits (approximately 4mm).
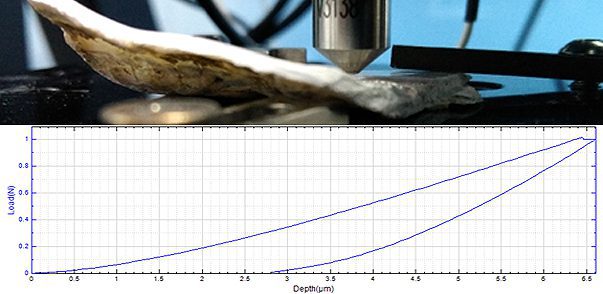
Biological Mechanical Properties of Oyster Shell
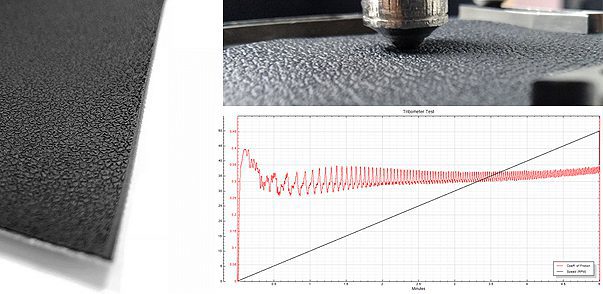
Leather Coefficient of friction Using Tribometer
Leather friction (COF) is quite important for leather since it can be used to characterize properties such as slip resistance, finish and material degradation. For leather used in footwear, the slip resistance must be sufficiently high. Slip resistance can be characterized by observing the static COF and dynamic COF with a Tribometer. COF also determines how much friction is produced when rubbing between two surfaces occur. This can be used to determine the aesthetic quality and durability of the leather finish when applied to clothing, tooling, and upholstery.
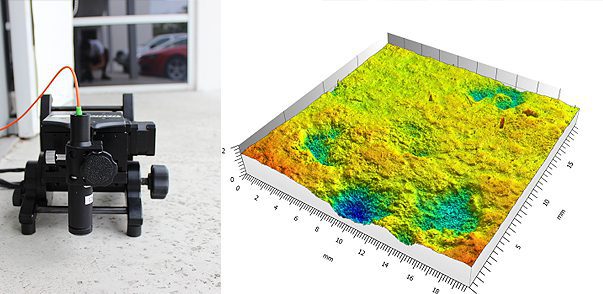
Concrete Roughness Using Portable 3D Profilometry
Measurement of nonconventional samples is difficult mainly due to problems mounting the sample onto a stage. For Nanovea’s JR25, the sample does not need to be mounted; it just has to remain unmoving. This means large objects such as walls, cars, or machines can be easily scanned. Its compact size makes it portable as well as diverse. It can tilt its pen sensor at an angle which makes it ideal in measuring samples that are not flat and have difficulties exposing its area of interest to a scanning probe. Since the 3D Non-Contact Profilometer uses axial chromatism technology, it can also measure any surface with minimal sample preparation. Nano to macro heights can be measured with zero influence from sample reflectivity, transparency, and curvature. The flexibility and portability of Nanovea JR25 3D Non-Contact Profilometer makes measuring a larger range of samples simpler than compared to conventional profilometers.
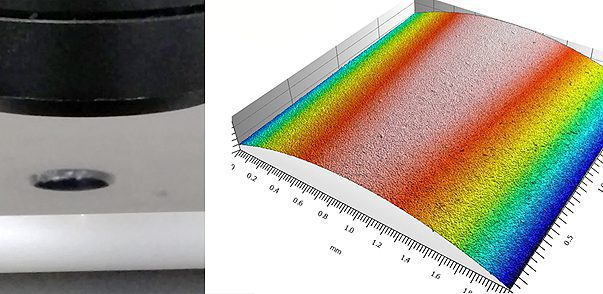
Polymeric Tube Finish and Dimension
Tubes made from polymeric material are commonly used in many industries ranging from automotive, medical, electrical, to many other categories. In this study, medical catheters made of different polymeric materials were studied using the Nanovea 3D Non-Contact Profilometer to measure surface roughness, morphology, and dimensions. Surface roughness is crucial for catheters as many problems with catheters, including infection, physical trauma, and inflammation can be linked with the catheter surface. Mechanical properties, such as coefficient of friction, can also be studied by observing surface properties. These quantifiable data can be obtained to ensure the catheter can be used for medical applications.
Mechanical Properties of Silicon Carbide Wafer Coatings
Understanding the mechanical properties of silicon carbide wafer coatings is critical. The fabrication process for microelectronic devices can have over 300 different processing steps and can take anywhere from six to eight weeks. During this process, the wafer substrate must be able to withstand the extreme conditions of manufacturing, since a failure at any step would result in the loss of time and money. The testing of hardness, adhesion/scratch resistance and COF/wear rate of the wafer must meet certain requirements in order to survive the conditions imposed during the manufacturing and application process to insure a failure will not occur.
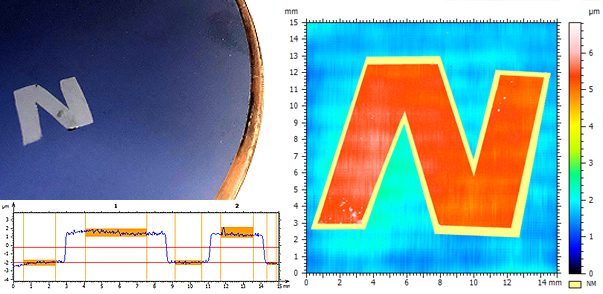
Wafer Coating Thickness Measurement Using 3D Profilometry
Wafer Coating Thickness Measurement is critical. Silicon wafers are widely used in the making of integrated circuits and other micro devices used in a vast number of industries. A constant demand for thinner and smoother wafers and wafer coatings makes the Nanovea 3D non-contact Profilometer a great tool to quantify coating thickness and roughness of just about any surface. The measurements in this article were taken from a coated wafer sample in order to demonstrate the capabilities of our 3D Non-Contact Profilometer.
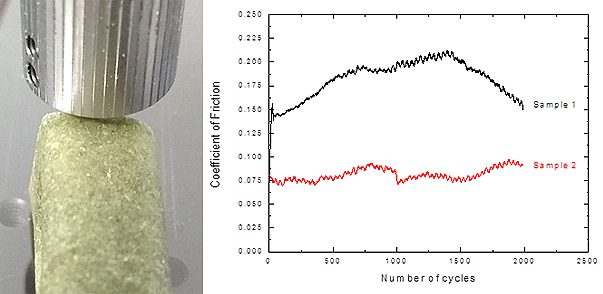
Tribology Study of Dental Dog Treat Friction
Flavored dental treats have been demonstrated as an effective, comfortable and easy to use method for dog dental cleaning. The Flavorful and chewy dental treats make teeth and gums cleaning an enjoyable procedure. During the chewing mechanical actions, the dental treat creates friction against the surface of the teeth to remove tartar and bacteria films. A reliable tribology study is needed to quantitatively compare the effectiveness of dog dental treats of different surface texture and roughness, and to provide insight of the correlation of the surface roughness, texture and friction to facilitate the R&D and quality control of the dental treat production.


