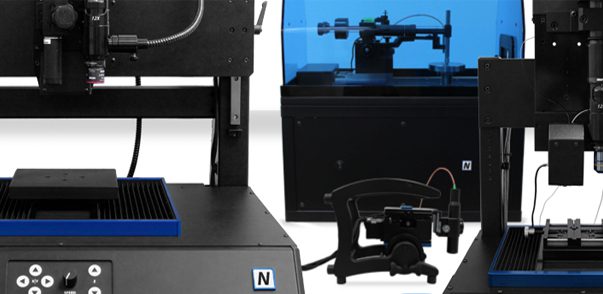
Nanovea 2018 Rebranding Visit Us at MRS Boston
Visit Nanovea @ MRS Boston, Nanovea will proudly have each instrument line on display! Including the completely redesigned PB1000 Mechanical Tester and the rebranded PS50 Profilometer and T50 Tribometer. Along with the new branding all instruments have received new staging for increased accuracy and acoustic dampening. Stay tuned, Nanovea has several other game-changing technical advancement coming soon! For more information please Contact Nanovea.
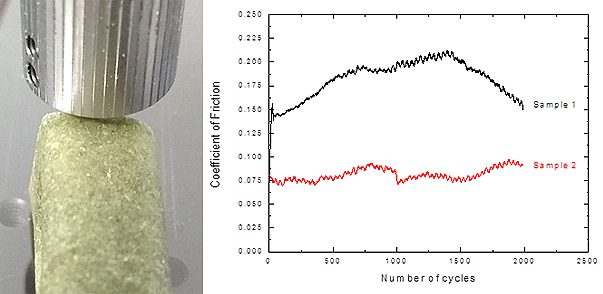
Tribology Study of Dental Dog Treat Friction
Flavored dental treats have been demonstrated as an effective, comfortable and easy to use method for dog dental cleaning. The Flavorful and chewy dental treats make teeth and gums cleaning an enjoyable procedure. During the chewing mechanical actions, the dental treat creates friction against the surface of the teeth to remove tartar and bacteria films. A reliable tribology study is needed to quantitatively compare the effectiveness of dog dental treats of different surface texture and roughness, and to provide insight of the correlation of the surface roughness, texture and friction to facilitate the R&D and quality control of the dental treat production.

Flatness Measurement of Screen Using Fast 3D Profilometry
Flatness measurement is an important geometric surface quality in the manufacture of precision parts and assemblies. Flatness of the surface plays a vital role in the end use of the product. For example, the parts that are connected in an air-tight or liquid-tight manner across a surface area require stringent surface conditions of superior flatness at the contact face. Flatness of the screen is critical to the functionality and aesthetics of electronic devices such as cellphones, pads and laptops. Any imperfection of the screen flatness can create negative user impression and experience of the product.
See Video Clip or Read Report: Flatness Measurement of Screen Using Fast 3D Profilometry

Microindentation Mapping on Glass
Microindentation mapping has proven to be a critical tool for surface mechanics related studies. Fracture has typically been evaluated by measuring the dimension of the cracks of the indent, and the use of acoustic emission during testing has been an overlooked and valuable tool. Microindentation with the measurement of Acoustic Emissions (AE) provides a reliable and user-friendly method to track the fracture behavior and intensity during loading and unloading process.
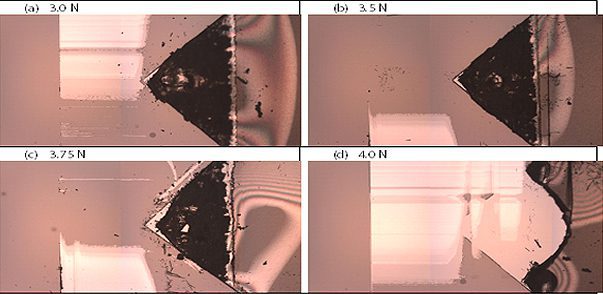
Micro Scrape Test Of Polymeric Coating
Scratch testing has developed to be one of the most widely applied methods to evaluate the cohesive and adhesive strength of the coatings. The critical load, at which a certain type of coating failure occurs as the applied load progressively increases, is widely regarded as a reliable tool to determine and compare the adhesive and cohesive properties of the coatings. The most commonly used indenter for scratch testing is the conical Rockwell diamond indenter. However, when the scratch test is performed on the soft polymeric coating deposited on a brittle substrate such as silicon wafer, the conical indenter tends to plough through the coating forming grooves rather than creating cracks or delamination. Cracking of the brittle silicon wafer takes place when the load further increases. Therefore, it is vital to develop a new technique to evaluate the cohesion or adhesion properties of soft coatings on a brittle substrate.

ASTM D7187 Temperature Effect Using Nanoscratching
ASTM D7187, the resistance of the paint to scratch and mar plays a vital role in its end use. Automotive paint susceptible to scratches makes it difficult and costly to maintain and repair. Different coating architectures of the primer, basecoat, and clearcoat have been developed to achieve the best scratch/mar resistance. Nanoscratch testing has been developed as a standard test method to measure the mechanistic aspects of scratch/mar behavior of paint coatings as described in ASTM D7187. Different elementary deformation mechanisms, namely elastic deformation, plastic deformation and fracture, occur at different loads during the scratch test. It provides a quantitative assessment of the plastic resistance and fracture resistance of the paint coatings.
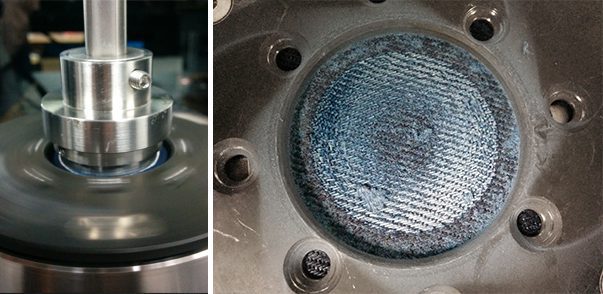
Textile Abrasion Wear By Tribometer
The measurement of textile abrasion resistance of fabrics is very challenging. Many factors play a role during the test, including the mechanical properties of the fibers, the structure of the yarns and the weave of the fabrics. This may result in poor reproducibility of test results and create difficulty in comparing values reported from different laboratories. Wear performance of the fabrics is critical to the manufacturers, distributors, and retailers in the textile production chain. A well-controlled quantifiable and reproducible Tribometer wear resistance measurement is crucial to ensure reliable quality control of the fabric production.
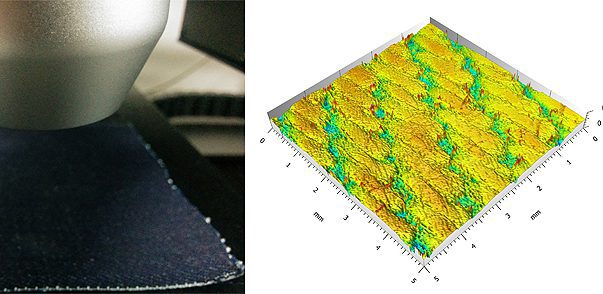
Textile Texture Measurement Using 3D Profilometry
Understanding textile texture, consistency and patterns of the fabrics allows the best selection of processing and control measures. Traditional stylus-based profilometers determine the surface morphology of the coatings by sliding in contact across the measured surface, which may deform the soft fabric and induce inaccurate measurement. The Nanovea 3D Non-Contact Profilometer utilize chromatic confocal technology with unmatched capability to provide a comprehensive analysis of the surface feature of fabrics, making it an ideal tool for reliable product inspection and quality control.

Tribology of Polymers by Tribometer
Tribology of Polymers are commonly seen for tribological applications, such as tires, bearings and conveyor belts. Different wear mechanisms occur depending on the mechanical properties of the polymer, the contact conditions, and the properties of the debris or transfer film formed during the wear process. In order to ensure that the polymers possess sufficient wear resistance under the service conditions, reliable and quantifiable tribological evaluation is in need. It allows us to quantitatively compare the wear behaviors of different polymers in a controlled and monitored manner and to select the best candidate for the target application. The Nanovea Tribometer offers repeatable wear and friction testing using ISO and ASTM compliant rotative and linear modes, with optional high temperature wear and lubrication modules available in one pre-integrated system. This unmatched range allows users to simulate different work environment of the polymers including concentrated stress, wear and high temperature, etc.


