Roughness Measurement of Pill Using 3D Profilometry
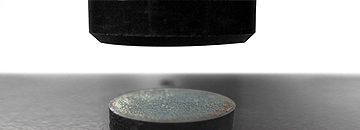
In this application, the ST400 Profilometer is used to measure and compare surface roughness measurement values of different types of tablets. Excedrin, Advil, and generic forms of Excedrin and Advil, distributed by SUPERVALU Inc., are the tablets measured in this application. Comparisons can be made between generic and name brand tablet surface roughness, between coated and uncoated tablet surface roughness, and also among the same type of tablet to check the variations in surface roughness, mainly through the standard deviation.
Here are examples of materials we tested this month:

Mechanical:
• Nanoindentation of bone samples
• Nanoindentation yield strength of mems
• Nanoindentation creep of polymers
• Nano Scratch of optical coating
• Nano Scratch of microwire
• Micro Scratch of tooling parts
• Microindentation compression of micropillers

3D Non-Contact Profilometry:
• Dimensions of optic lens
• Roughness of textured aluminum
• Roughness of composites
• Thin film surface flatness
• Coplanarity of mems grid
• Volume loss of wear tracks
• Step heights of coating oxidation

Tribology:
• Friction testing of composites
• Friction testing of polymers
• Wear resistance of hard coatings
• Wear resistance of turbine sample
• Wear resistance of steel samples

Surface Area Measurement of Oxidation With 3D Profilometry
The 3D Non Contact Profilometer will be used to characterize the surface area measurement of two samples with A1SiN coatings, one with a low level of silicon the other with a high level. The A1SiN coating was deposited on H13 Steel by magnetron sputtering then submitted to an oxidation resistance test (900°C-1hour).

Tribological Characterization of Ti-WS2 Coating
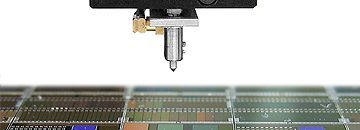
In this report we will review the tribological characterization of Ti-WS2 coating deposited by Magnetron Sputtering technique. The friction and wear tribology will be obtained with the Tribometer in reciprocating mode and an integrated optical profiler will be used to obtain wear rate.
Here are examples of materials we tested this month:

Mechanical:
• Nanoindentation of microseal
• Nanoindentation compression of micro ceramic
• Nanoindentation of micro rubber features
• Nano Scratch of microfeatures
• Nano Friction microtube
• Micro Scratch of engine parts
• Microindentation of coil coatings
• Microindentation yield strength of micro rods

3D Non-Contact Profilometry:
• Topography of rubber samples
• Profile of micro parts
• Roughness of metal samples
• Roughness of wood samples
• Coplanarity of micro features
• Step height of microchannels
• Volume loss of micro pits
• Friction testing of liquid with micro particles
• Friction testing of metal samples
• Wear resistance of hard coatings
• Wear resistance of tile samples
• Wear resistance of polished concrete
Here are examples of materials we tested this month:

Mechanical:
• Nanoscratch failure of micro rod coating
• Nanoindentation compression of microparticle
• Nanoindentation DMA of soft polymer
• Nanowear of implant
• Microindentation yeild strength engine part
• Micro scratch/mar of hard composite

3D Non-Contact Profilometry:
• Surface area of biomaterials
• Volume of micro nozzle
• Topography of adhesive
• Roughness of micro wire
• Roughness of thin films
• Texture of various rock samples
• Flatness of glass samples

Tribology:
• Friction testing of liquid solution
• Wear resistance of porcelain
• Wear resistance of hard optical coatings
• Wear resistance of implant samples

Scratch Resistance of Microstructure using Scratch Testing
In this application, the Nanovea Mechanical Tester in its nano scratch testing mode is used to measure the load required to cause failure to a microstructure. We must simulate the process of scratching in a controlled and monitored manner to observe scratch resistance. A 10μm diamond tipped stylus is used at a progressive load ranging from 10 mN to 20 mN to scratch the microstructure. The point where the coating fails by cracking is taken as the point of failure.

Connector Pin Inspection With 3D Profilometry
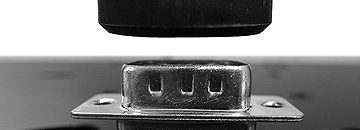
In this application, the Nanovea ST400 Profilometer is used to measure the full area of a connector surface and its pins. The application was chosen for its challenging features while highlighting the measurement options with Nanovea’s technique. There is an endless list surface parameters that can be automatically calculated after the surface scan. Here we will review a full 3D profile, flatness of the connector base, coplanarity of the pins and the roughness of a pin tip.
Here are examples of materials we tested this month:

Mechanical:
• Nanoindentation of micro features
• Nanoindentation fracture of nanocomposite
• Nanoindentation DMA of gel
• Nanoindentation DMA of steel
• Nano Wear of nano composite coatings
• Micro Scratch of coil coating
• Microindentation mapping of hard polymer
• Microindentation yield strength of micro rods

3D Non-Contact Profilometry:
• Roughness measurement of micro medical parts
• Roughness of peened surface
• Roughness of micro wire
• Roughness of mini turbine blade
• Step height of polymer structures
• Area of machined surface alteration

Tribology:
• COF of implant surface
• COF of medical device
• Wear rate of pvc tubing
• Wear rate of polished aluminum
• Wear rate of iron aluminide
Here are examples of materials we tested this month:

Mechanical:
• Nanoindentation mapping of bone
• Nanoindentation DMA of polymer
• Nanoindentation compression of micro features
• Nano scratch of self healing coating
• Micro wear of prosthetic
• Microindentation mapping of ceramic
• Microindentation yield strength of composite

3D Non-Contact Profilometry:
• Topography of micro parts
• Profile of composite panel
• Roughness of peened surface
• Roughness of dental implant
• Roughness of mini turbine blade
• Dimension of microspheres
• Coplanarity of surface steps
• Friction testing of brake pad
• Friction testing of various lubricants
• Friction testing of medical device
• Wear resistance of polished hard wood
• Wear resistance of polished concrete
• Self lubricating composite wear and friction


