Here are examples of materials we tested this month:

Mechanical:
• Nanoindentation of multi-layered rubber tubing
• Nanoindentation of dlc coating
• Nanoscratch of thin copper & alumina coating
• Microindentation ultimate tensile strength of steel samples
• Microscratch brittle metallic coatings
• Macroindentation compression of hard particles

3D Non-Contact Profilometry:
• Roughness of large silicon ingot
• Isotropy of textured cable
• Dimensions of MEMS
• Topography of golf ball
• Topography of fish scale
• Area of textured metal
• Friction testing textured cable
• Friction testing lubrication
• Wear testing dlc coating
• Wear testing treated steel
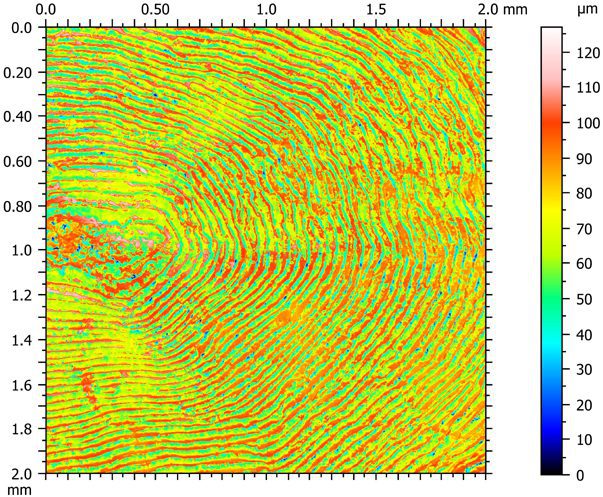
The Profilometer Becomes a Tool For Zoology Research!
Above is a 3D surface measurement of a fish scale with interest to identify front and back surface characteristics. Zoology Research is yet another example of the endless possible applications for the accuracy of the Nanovea Profilometer. Learn more in this months application note.
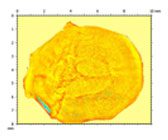
Fish Scale Surface Characterization Using 3D Profilometry
In this application the Nanovea ST400 Profilometer is used to scan the entire surface of the scale, along with a smaller higher resolution scan in the center of the scale The outer and inner side surface roughness of the scale was also measured for comparison.
Surface Characterization of Fish Scale Using 3D Profilometry
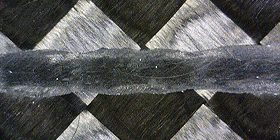
Mechanical & Tribological Properties of Carbon Fiber
Combined with the wear test by Tribometer and surface analysis by Optical 3D Profilometer, we
showcase the versatility and accuracy of the Nanovea instruments in testing composite materials
with directional mechanical properties.
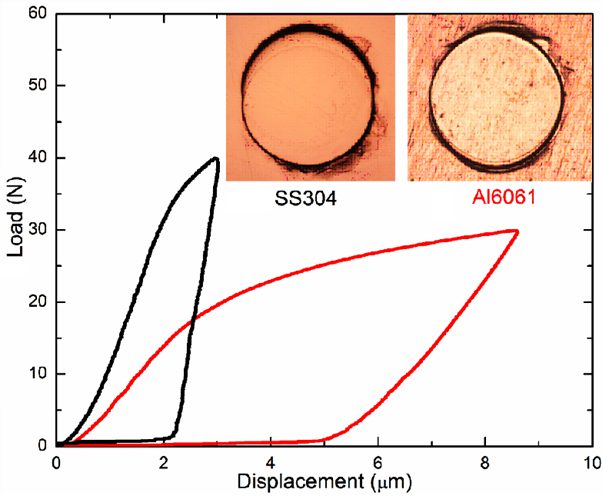
Breakthrough Measurement Proven on Steel & Aluminum
For the first time, Nanovea has developed a breakthrough method of reliably acquiring both yield strength (YS) and ultimate tensile strength (UTS) through the indentation technique; which has significant advantages when compared to the traditional tensile testing. Learn more in this months updated application note.
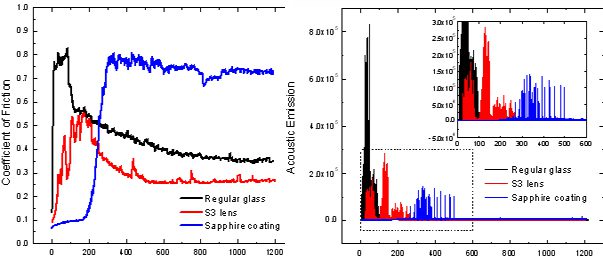
Using Acoustic Emission (AE) During Wear Testing
During Tribometer wear testing, the constant rubbing process of the counterface against the test sample creates a series of events, such as deformation, cracking, abrasion, phase transformation and material removal. These rapid stress-releasing events are the sources of AE. A quantifiable and reliable measurement of AE can provide more insight in the wear failure mechanism. Learn more in this months application note.
Wear Testing Glass With Acoustic Emissions Monitoring
The wear behavior of three types of glass (Regular glass, Galaxy S3 glass and Sapphire coated glass) is compared in a controlled and monitored manner using the Nanovea Tribometer equipped with an AE detector. In this study, we would like to show the application of AE detection during wear and its correlation with the evolution of coefficient of friction (COF).
Here are examples of materials we tested this month:

Mechanical:
• Nanoindentation of micro copper wire
• Nanoindentation of metallic coatings on plastic
• Nanoindentation compression of particles
• Microindentation mapping of dental implant
• Scratch Hardness of electronic covers

3D Non-Contact Profilometry:
• Topography of archaeology artifact
• Roughness of polyurethane
• Dimensions sharp edges
• Coplanarity of electronics
• Thickness of coatings
• Volume & Area of corrosion

Tribology:
• Friction Testing reinforced polyurethane belting
• Friction testing polymer on polymer
• Wear testing hard polymers
• Wear testing treated steel
Here are examples of materials we tested this month:

Mechanical:
• Nanoindentation of intraocular lens material
• Nanoindentation yield strength of micro samples
• Nano scratch of teflon coated wires
• Microscratch of lithograph samples
• Microscratch of ceramic coatings

3D Non-Contact Profilometry:
• Topography of seeds
• Roughness of led light fixture
• Roughness of laser cut steel
• Roughness of hip implant
• Volume loss of abraded perspex samples

Tribology:
• Stribeck curve testing heated lubrication samples
• Wear testing anodized coatings
• Wear testing dlc coatings
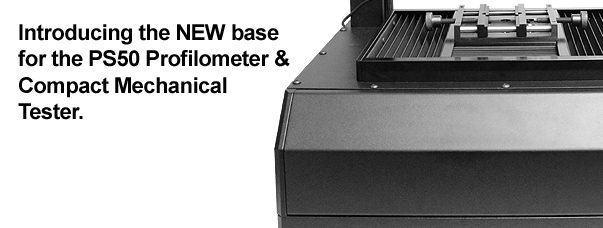
Redesigned Compact Profilometer & Mechanical Tester
The product enhancement, of both the PS50 Profilometer and Compact Mechanical Tester, showcase Nanovea’s dedication to consistent improvement. The two high-end entry level options have been redesigned with new bases to coordinate with Nanovea’s standard. The PS50 Profilometer and Compact Mechanical Tester provide accuracy and capability unmatched in each of their respective class.


