Monthly Archives: July 2016

Cutting Tool Edge Measurement in Seconds
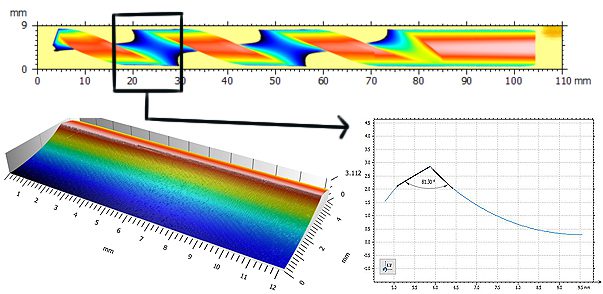
Irvine CA, July 27, 2016 – Conventional profilometry scans sample surfaces from a single, fixed direction. This is only appropriate for measuring sufficiently flat samples, as opposed to cylindrical shapes that require a precise 360° rotation. For an application such as characterizing the helical cutting edge of a tool, a conventional machine would need multiple scans from different angles of the entire part, as well as significant post scan data manipulation. This is often too time consuming for QC applications that only require measurements from very specific regions.
NANOVEA’S rotational stage solves this problem with simultaneous motion control of the lateral and rotational axes. This technique eliminates the time consuming need of measuring the entire part and continuous realignment. Instead, the full circumference of the entire cutting edge can be determined in seconds. All desired angles and features can be directly determined from the scan, with no need for the extensive stitching together of multiple files.
NANOVEA’s chromatic confocal technique offers far greater resolution, down to 2.7 nm, and accuracy than Focus Variation competitors. The raw surface height is measured directly from the detection of the wavelength focused on the surface, with none of the errors caused by Interferometry techniques, no field of view limitations, and no need for sample surface preparation. Materials with extremely high or low reflectivity can easily be measured and very high wall angles are accurately characterized without any issue.
Coupled with NANOVEA’s line sensor, a bar of data up to 4.78mm wide can be captured in a single pass, while moving linearly for up to 150mm in the scanning direction. Simultaneously, the rotational stage can revolve the sample at the desired speed. Put together, this system allows for the creation of a continuous 3D height map of the entire circumference of a cutting edge, with any pitch or radius, in a fraction of the time when compared to other technologies.
See App Note: Rotational Measurement Using 3D Profilometry

Polymer Morphology by Heat Deformation
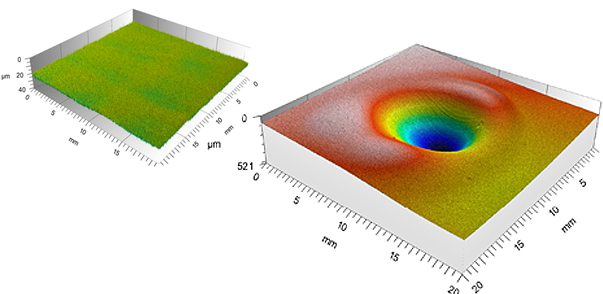
Surface deformation of materials induced by environmental elements such as temperature, humidity and corrosion is vital to its service quality and functionality. Accurate 3D polymer morphology measurement allows quantifying the physical deformations of the surface form, roughness, volume/area, etc. Surfaces prone to deformation due to contact wear, high heat and others need regular inspection to ensure performance reliability.
Polymer Morphology by Heat Deformation Using 3D Profilometry

Teflon Mechanical Properties at High Temperature
At elevated temperatures, heat changes teflon mechanical properties such as the hardness and viscoelasticity, which may result in mechanical failures. A reliable measurement of the thermo-mechanical behavior of polymeric materials is in need to quantitatively evaluate the candidate materials for high temperature applications. The Nano module of the Nanovea Mechanical Tester studies the Hardness, Young’s Modulus and Creep by applying the load with a high-precision piezo and measuring the evolution of force and displacement. An advanced oven creates a uniform temperature surrounding the indentation tip and the sample surface throughout the nanoindentation test so as to minimize the effect of thermal drift.
Teflon Mechanical Properties at High Temperature Using Nanoindentation

High Temperature Arc Reciprocating Wear
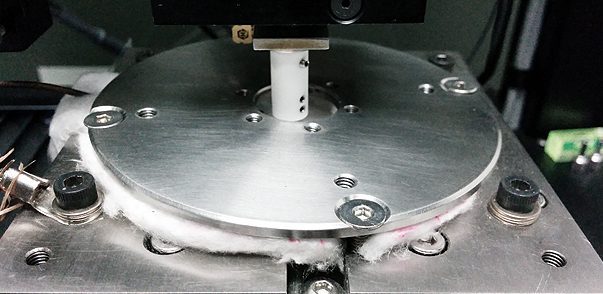
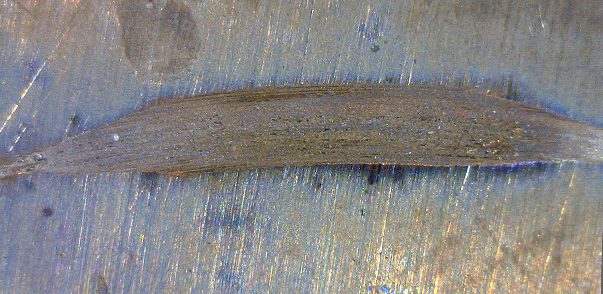
ASTM G133 3 is a widely used standard setup for testing the reciprocating sliding wear behaviors of materials. Due to the back and forth movement of the sample involved during the arc reciprocating wear testing, it is challenging to design an oven that fully enclose the sample and reaches a high and homogenous temperature. Our previous study has shown that the material tested using reciprocating and rotational setups can exhibit significantly different wear behaviors. Therefore, in order to study the reciprocating wear behaviors of materials at elevated temperatures, we developed the arc wear test setup. It rotates the sample stage for pin-on-disc test and continuously oscillates it clockwise and counterclockwise, creating a arc reciprocating sliding motion for the sample. The contact of the wear process can be totally enclosed in a large oven which ensures uniform and stable temperature up to 950oC surrounding the sample and the counter material.


