Monthly Archives: October 2020
Fresnel Lens Topography
FRESNEL LENS TOPOGRAPHYUSING 3D NON-CONTACT OPTICAL PROFILOMETER

Prepared by
Duanjie Li & Benjamin Mell
INTRODUCTION
A lens is an optical device of axial symmetry that transmits and refracts light. A simple lens consists of a single optical component for converging or diverging the light. Even though spherical surfaces are not ideal shape for making a lens, they are often used as the simplest shape which glass can be ground and polished to.
A Fresnel lens consists of a series of concentric rings, which are thin parts of a simple lens with a width as small as a few thousandths of an inch. Fresnel lenses contain a large aperture and short focal length, with a compact design reducing the weight and volume of material required, compared to conventional lenses with the same optical properties. A very small amount of light is lost by absorption due to the thin geometry of the Fresnel lens.
IMPORTANCE OF 3D NON-CONTACT PROFILOMETRY FOR FRESNEL LENS INSPECTION
Fresnel lenses are extensively employed in the automotive industry, lighthouses, solar energy and optical landing systems for aircraft carriers. Molding or stamping the lenses out of transparent plastics can make their production cost-effective. Service quality of Fresnel lenses mostly depends on the precision and surface quality of their concentric ring. Unlike a touch probe technique, NANOVEA Optical Profilers perform 3D surface measurements without touching the surface, avoiding the risk of making new scratches. The Chromatic Light technique is ideal for precise scanning of complex shapes, such as lenses of different geometries.
FRESNEL LENS SCHEMATIC
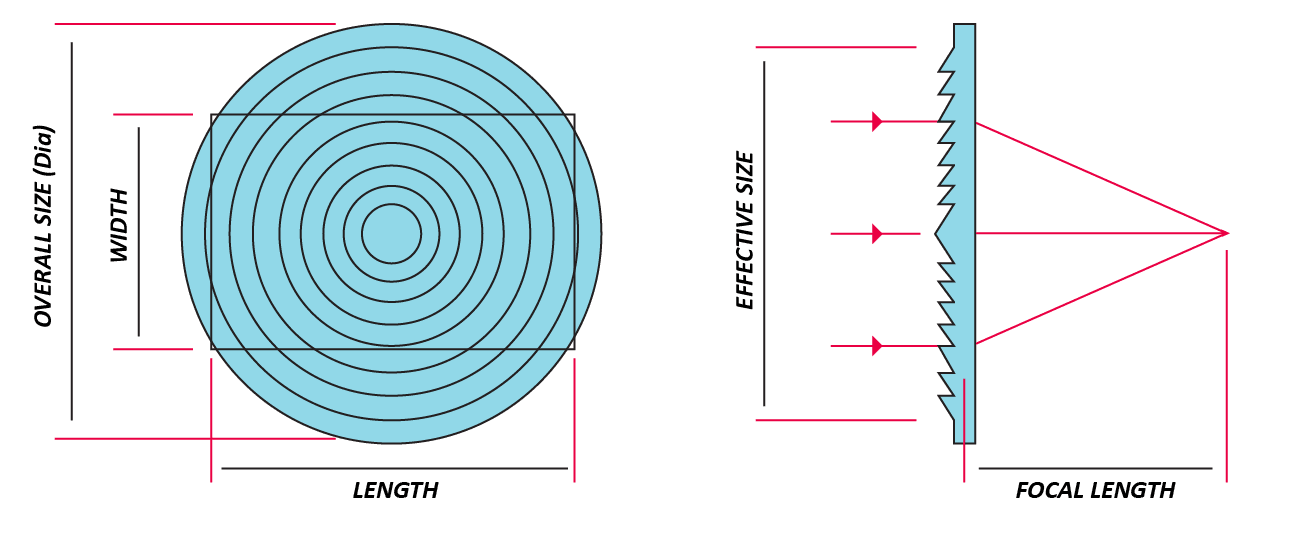
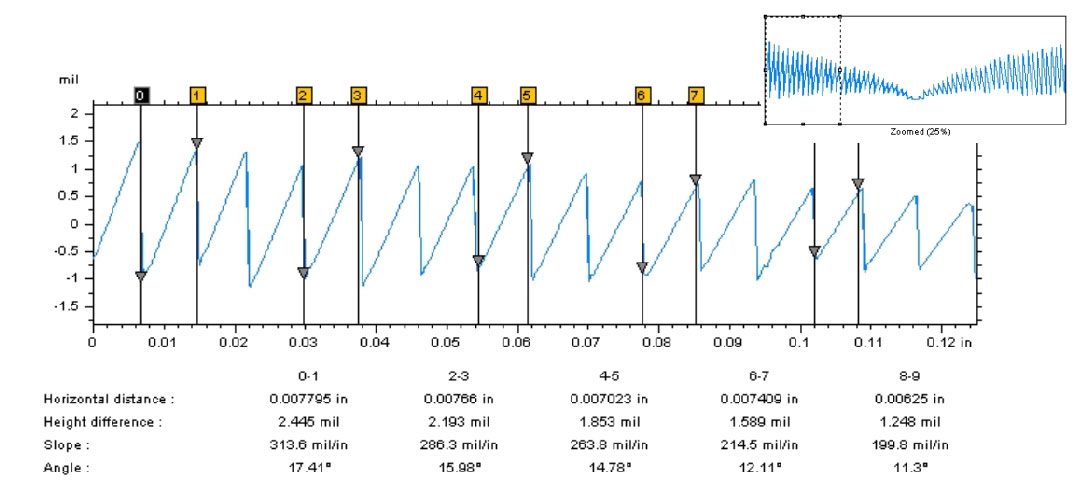
Transparent plastic Fresnel lenses can be manufactured by molding or stamping. Accurate and efficient quality control is critical to reveal defective production molds or stamps. By measuring the height and pitch of the concentric rings, production variations can be detected by comparing the measured values against the specification values given by the manufacturer of the lens.
Precise measurement of the lens profile ensures that the molds or stamps are properly machined to fit manufacturer specifications. Moreover, the stamp could progressively wear out over time, causing it to lose its initial shape. Consistent deviation from the lens manufacturer specification is a positive indication that the mold needs to be replaced.
MEASUREMENT OBJECTIVE
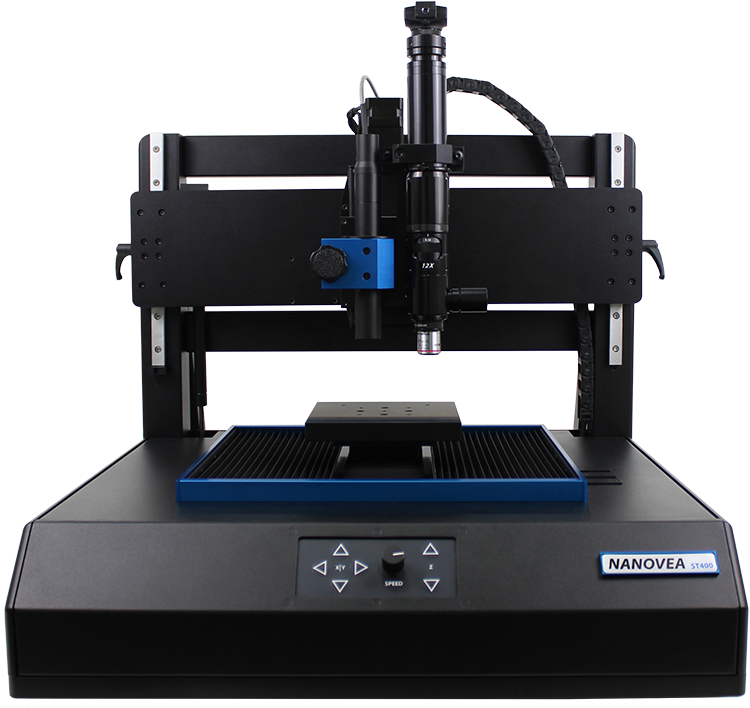
In this application, we showcase NANOVEA ST400, a 3D Non-Contact Profiler with a high-speed sensor, providing comprehensive 3D profile analysis of an optical component of a complex shape. To demonstrate the remarkable capabilities of our Chromatic Light technology, the contour analysis is performed on a Fresnel lens.
NANOVEA ST400 Large Area
Optical 3D Profilometer
The 2.3” x 2.3” acrylic Fresnel lens used for this study consists of
a series of concentric rings and a complex serrated cross-section profile.
It has a 1.5” focal length, 2.0” effective size diameter,
125 grooves per inch, and an index of refraction of 1.49.
The NANOVEA ST400 scan of the Fresnel lens shows a noticeable increase in height of the concentric rings, moving outward from the center.
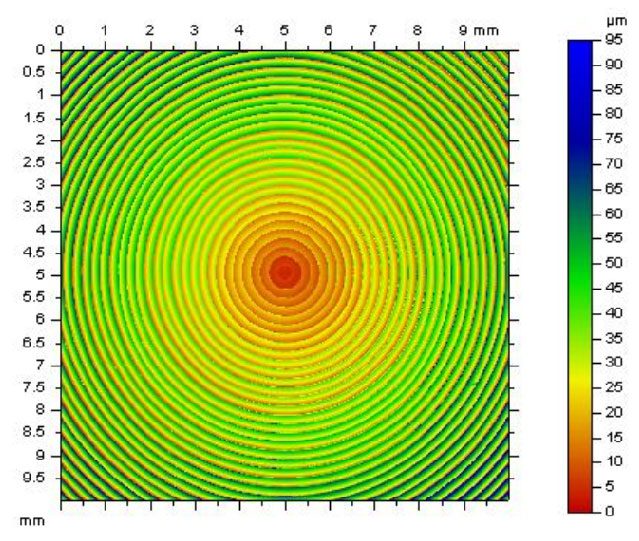
2D FALSE COLOR
Height Representation
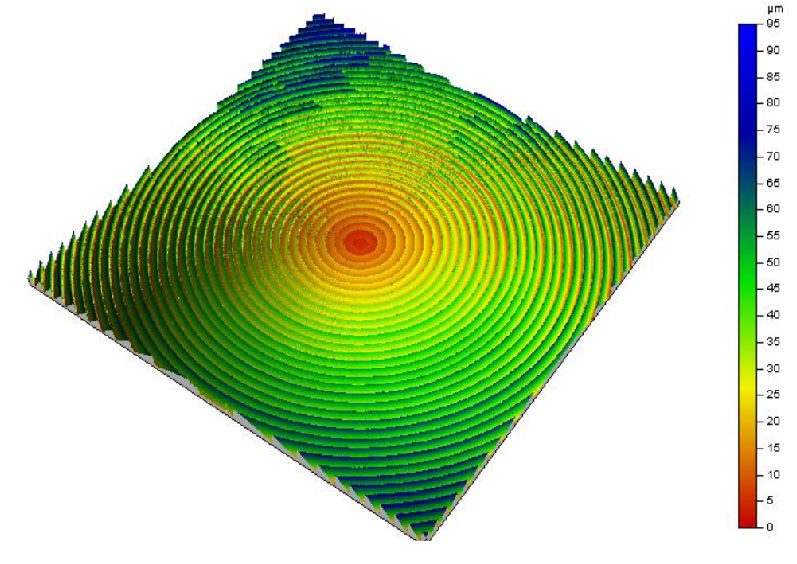
3D VIEW
EXTRACTED PROFILE

PEAK & VALLEY
Dimensional Analysis of the Profile
CONCLUSION
In this application, we have showcased that the NANOVEA ST400 non-contact Optical Profiler accurately measures the surface topography of Fresnel lenses.
The dimension of the height and pitch can be accurately determined from the complex serrated profile using NANOVEA analysis software. Users can effectively inspect the quality of the production molds or stamps by comparing the ring height and pitch dimensions of manufactured lenses against the ideal ring specification.
The data shown here represents only a portion of the calculations available in the analysis software.
NANOVEA Optical Profilers measure virtually any surface in fields including Semiconductors, Microelectronics, Solar, Fiber Optics, Automotive, Aerospace, Metallurgy, Machining, Coatings, Pharmaceutical, Biomedical, Environmental and many others.
Categories
- Application Notes
- Block on Ring Tribology
- Corrosion Tribology
- Friction Testing | Coefficient of Friction
- High Temperature Mechanical Testing
- High Temperature Tribology
- Humidity and Gases Tribology
- Humidity Mechanical Testing
- Indentation | Creep and Relaxation
- Indentation | Fracture Toughness
- Indentation | Hardness and Elastic
- Indentation | Loss and Storage
- Indentation | Stress vs Strain
- Indentation | Yield Strength and Fatigue
- Laboratory Testing
- Linear Tribology
- Liquid Mechanical Testing
- Liquid Tribology
- Low Temperature Tribology
- Mechanical Testing
- Press Release
- Profilometry | Flatness and Warpage
- Profilometry | Geometry and Shape
- Profilometry | Roughness and Finish
- Profilometry | Step Height and Thickness
- Profilometry | Texture and Grain
- Profilometry | Volume and Area
- Profilometry Testing
- Ring on Ring Tribology
- Rotational Tribology
- Scratch Testing | Adhesive Failure
- Scratch Testing | Cohesive Failure
- Scratch Testing | Multi-Pass Wear
- Scratch Testing | Scratch Hardness
- Scratch Testing Tribology
- Tribology Testing
- Uncategorized
Archives
- March 2026
- November 2025
- September 2023
- August 2023
- June 2023
- May 2023
- July 2022
- May 2022
- April 2022
- January 2022
- December 2021
- November 2021
- October 2021
- September 2021
- August 2021
- July 2021
- June 2021
- May 2021
- March 2021
- February 2021
- December 2020
- November 2020
- October 2020
- September 2020
- July 2020
- May 2020
- April 2020
- March 2020
- February 2020
- January 2020
- November 2019
- October 2019
- September 2019
- August 2019
- July 2019
- June 2019
- May 2019
- April 2019
- March 2019
- January 2019
- December 2018
- November 2018
- October 2018
- September 2018
- July 2018
- June 2018
- April 2018
- March 2018
- February 2018
- November 2017
- October 2017
- September 2017
- August 2017
- June 2017
- May 2017
- March 2017
- February 2017
- January 2017
- November 2016
- October 2016
- August 2016
- July 2016
- June 2016
- May 2016
- April 2016
- March 2016
- February 2016
- January 2016
- December 2015
- November 2015
- October 2015
- September 2015
- August 2015
- July 2015
- June 2015
- May 2015
- April 2015
- March 2015
- February 2015
- January 2015
- November 2014
- October 2014
- September 2014
- August 2014
- July 2014
- June 2014
- May 2014
- April 2014
- March 2014
- February 2014
- January 2014
- December 2013
- November 2013
- October 2013
- September 2013
- August 2013
- July 2013
- June 2013
- May 2013
- April 2013
- March 2013
- February 2013
- January 2013
- December 2012
- November 2012
- October 2012
- September 2012
- August 2012
- July 2012
- June 2012
- May 2012
- April 2012
- March 2012
- February 2012
- January 2012
- December 2011
- November 2011
- October 2011
- September 2011
- August 2011
- July 2011
- June 2011
- May 2011
- November 2010
- January 2010
- April 2009
- March 2009
- January 2009
- December 2008
- October 2008
- August 2007
- July 2006
- March 2006
- January 2005
- April 2004
