Monthly Archives: November 2013
Here are examples of materials we tested this month:

Mechanical:
• Nanoindentation mapping of micro parts
• Nanoindentation fracture of ceramic samples
• Nano Scratch of coated glass
• Nano Scratch failure of implant coatings
• Macroindentation of anodized coatings
• Micro Scratch of acrylic urethane coatings
• Macro Scratch of rock samples

3D Non-Contact Profilometry:
• Roughness of micro channels
• Roughness of curved plastics
• Texture of micro emboss
• Finish of powder coatings
• Coplanarity of micro features
• Dimensions of micro parts

Tribology:
• Linear Wear Testing of engine parts
• Rotative Wear Testing of ceramic samples

COLLABORATION TO IMPROVE TABER ABRASION TESTING
Traditionally, Taber abrasion testing is carried out to evaluate the wear resistance of Industrial Coatings according to ASTM D4060 Standard. However, as mentioned in the ASTM D4060 standard, “For some materials, abrasion tests utilizing the Taber Abraser may be subject to variation due to changes in the abrasive characteristics of the wheel during testing.” This may result in poor reproducibility of test results and create difficulty in comparing values reported from different laboratories. Moreover, in Taber abrasion test, abrasion resistance is calculated as loss in weight at a specified number of abrasion cycles. However, for example acrylic urethane floor paints have a recommended dry film thickness of 37.5-50 μm. The aggressive abrasion process by Taber Abraser can quickly wear through the acrylic urethane coating and create mass loss to the substrate, which leads to substantial errors in the calculation of the paint weight loss. The implant of abrasive particles in the paint during the abrasion test also contributes to the errors. Therefore, a well-controlled quantifiable and reliable measurement is crucial to ensure reproducible wear evaluation; such as a Tribometer.
Learn more in this months app note: Industrial Coating Scratch & Wear Evaluation

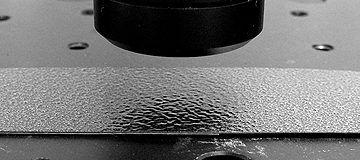
Powder Coating Finish Measurement Using 3D Profilometry
In this application, the Nanovea ST400 Profilometer is used to measure and compare the surface finish of four different Powder Coating samples. Several surface parameters will be automatically calculated from the coating profile. Here we will focus on Surface Roughness, Peak to Valley and Surface Area for comparative evaluation.


