USA/GLOBAL: +1-949-461-9292
EUROPE: +39-011-3052-794
CONTACT US

PTFE Coating Wear Test

PTFE COATING WEAR TEST

USING TRIBOMETER AND MECHANICAL TESTER

Prepared by

DUANJIE LI, PhD

INTRODUCTION

Polytetrafluoroethylene (PTFE), commonly known as Teflon, is a polymer with an exceptionally low coefficient of friction (COF) and excellent wear resistance, depending on the applied loads. PTFE exhibits superior chemical inertness, high melting point of 327°C (620°F), and maintains high strength, toughness, and self-lubrication at low temperatures. The exceptional wear resistance of  PTFE coatings makes them highly sought-after in a wide range of industrial applications, such as automotive, aerospace, medical, and, notably, cookware.

IMPORTANCE OF QUANTITATIVE EVALUATION OF PTFE COATINGS

The combination of a super low coefficient of friction (COF), excellent wear resistance, and exceptional chemical inert- ness at high temperatures makes PTFE an ideal choice for non-stick pan coatings. To further enhance its mechanical processes during R&D, as well as ensure optimal control over malfunction prevention and safety measures in the Quality Control process, it is crucial to have a reliable technique for quantity evaluating the tribomechanical processes of PTFE coatings. Precise control over surface friction, wear, and adhesion of the coatings is essential to ensure their intended performance.

MEASUREMENT OBJECTIVE

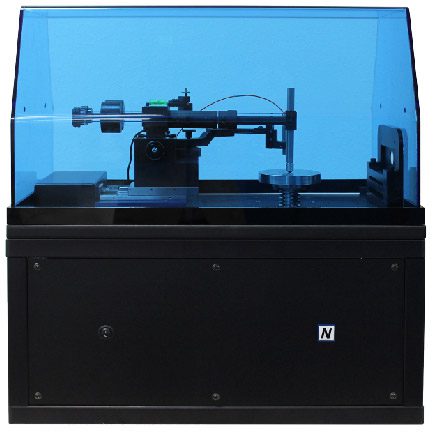
In this application, the wear process of a PTFE coating for a non-stick pan is simulated using NANOVEA Tribometer in linear reciprocating mode.

NANOVEA T50

Compact Free Weight Tribometer

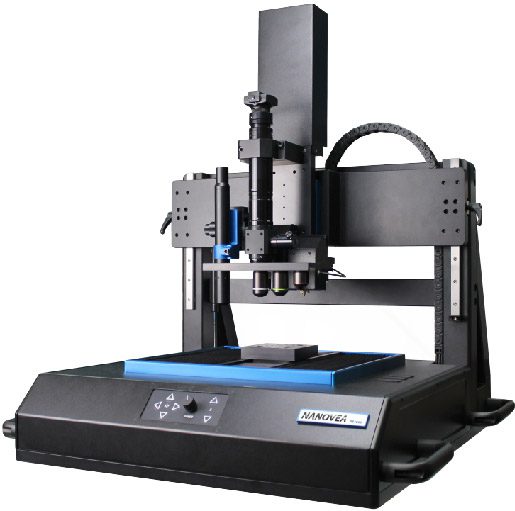
In addition, the NANOVEA Mechanical Tester was used to perform a micro scratch adhesion test to determine the critical load of the PTFE coating adhesion failure.

NANOVEA PB1000

Large Platform Mechanical Tester

TEST PROCEDURE

WEAR TEST

LINEAR RECIPROCATING WEAR USING A TRIBOMETER

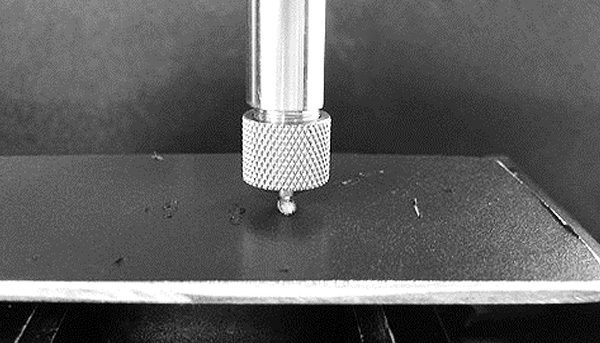
The tribological behavior of the PTFE coating sample, including the coefficient of friction (COF) and wear resistance, was evaluated using the NANOVEA Tribometer in linear reciprocating mode. A Stainless Steel 440 ball tip with a diameter of 3 mm (Grade 100) was used against the coating. The COF was continuously monitored during the PTFE coating wear test.


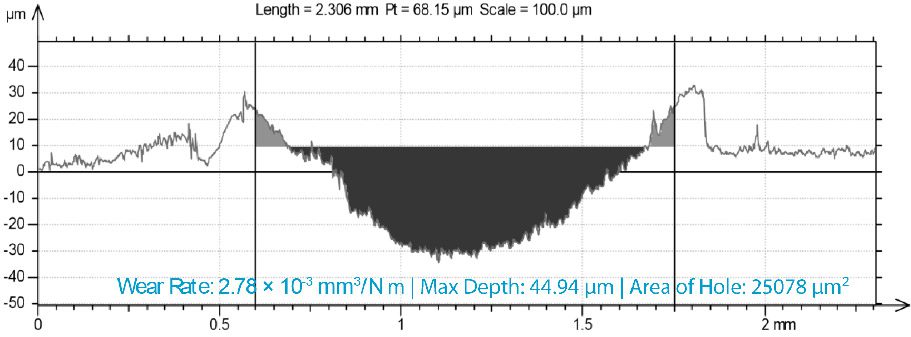
The wear rate, K, was calculated using the formula K=V/(F×s)=A/(F×n), where V represents the worn volume, F is the normal load, s is the sliding distance, A is the cross-sectional area of the wear track, and n is the number of strokes. The wear track profiles were evaluated using the NANOVEA Optical Profilometer, and the wear track morphology was examined using an optical microscope.

WEAR TEST PARAMETERS

LOAD 30 N
TEST DURATION 5 min
SLIDING RATE 80 rpm
AMPLITUDE OF TRACK 8 mm
REVOLUTIONS 300
BALL DIAMETER 3 mm
BALL MATERIAL Stainless Steel 440
LUBRICANT None
ATMOSPHERE Air
TEMPERATURE 230C (RT)
HUMIDITY 43%

TEST PROCEDURE

SCRATCH TEST

MICRO SCRATCH ADHESION TEST USING MECHANICAL TESTER

The PTFE scratch adhesion measurement was conducted using the NANOVEA Mechanical Tester with a 1200 Rockwell C diamond stylus (200 μm radius) in the Micro Scratch Tester Mode.


To ensure the reproducibility of the results, three tests were performed under identical testing conditions.

SCRATCH TEST PARAMETERS

LOAD TYPE Progressive
INITIAL LOAD 0.01 mN
FINAL LOAD 20 mN
LOADING RATE 40 mN/min
SCRATCH LENGTH 3 mm
SCRATCHING SPEED, dx/dt 6.0 mm/min
INDENTER GEOMETRY 120o Rockwell C
INDENTER MATERIAL (tip) Diamond
INDENTER TIP RADIUS 200 μm

RESULTS & DISCUSSION

LINEAR RECIPROCATING WEAR USING A TRIBOMETER

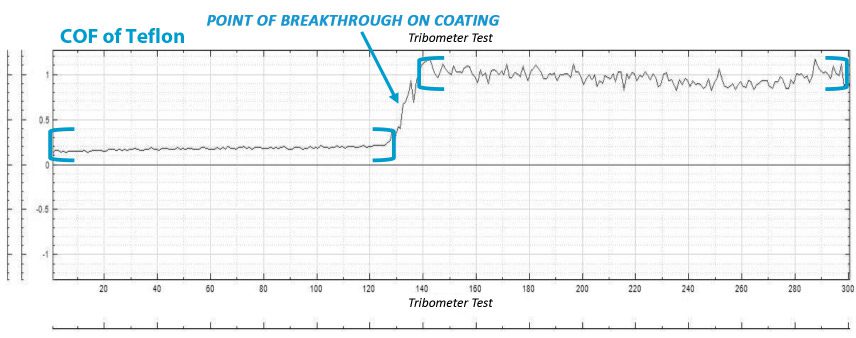
The COF recorded in situ is shown in FIGURE 1. The test sample exhibited a COF of ~0.18 during the first 130 revolutions, due to the low stickiness of PTFE. However, there was a sudden increase in COF to ~1 once the coating broke through, revealing the substrate underneath. Following the linear reciprocating tests, the wear track profile was measured using the NANOVEA Non-Contact Optical Profilometer, as shown in FIGURE 2. From the data obtained, the corresponding wear rate was calculated to be ~2.78 × 10⁻³ mm3/Nm, while the depth of the wear track was determined to be 44.94 µm.

PTFE coating wear test setup on the NANOVEA T50 Tribometer.

FIGURE 1: Evolution of COF during the PTFE coating wear test.

FIGURE 2: Profile extraction of wear track PTFE.

PTFE Before breakthrough

Max COF 0.217
Min COF 0.125
Average COF 0.177

PTFE After breakthrough

Max COF 0.217
Min COF 0.125
Average COF 0.177

TABLE 1: COF before and after breakthrough during the wear test.

RESULTS & DISCUSSION

MICRO SCRATCH ADHESION TEST USING MECHANICAL TESTER

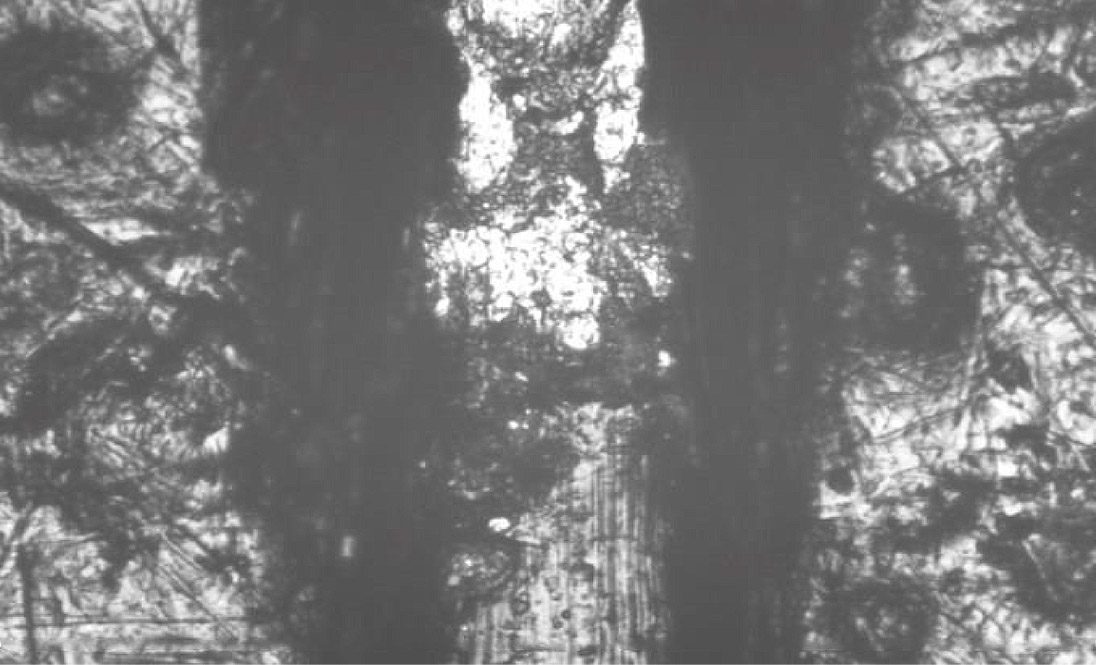
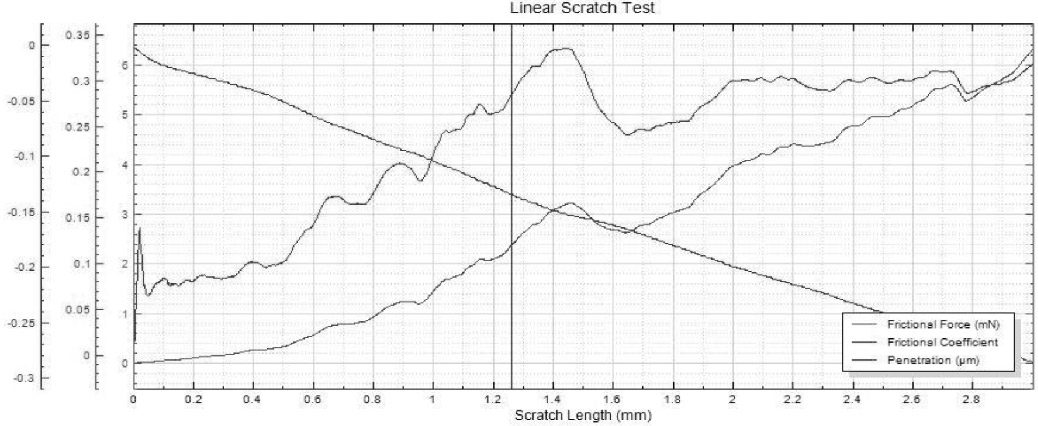
The adhesion of the PTFE coating to the substrate is measured using scratch tests with a 200 µm diamond stylus. The micrograph is shown in FIGURE 3 and FIGURE 4, Evolution of COF, and penetration depth in FIGURE 5. The PTFE coating scratch test results are summarized in TABLE 4. As the load on the diamond stylus increased, it progressively penetrated into the coating, resulting in an increase in the COF. When a load of ~8.5 N was reached, the breakthrough of the coating and exposure of the substrate occurred under high pressure, leading to a high COF of ~0.3. The low St Dev shown in TABLE 2 demonstrates the repeatability of the PTFE coating scratch test conducted using the NANOVEA Mechanical Tester.

FIGURE 3: Micrograph of the full scratch on PTFE (10X).

FIGURE 4: Micrograph of the full scratch on PTFE (10X).

FIGURE 5: Friction graph showing the line of the critical point of failure for PTFE.

Scratch Point of Failure [N] Frictional Force [N] COF
1 0.335 0.124 0.285
2 0.337 0.207 0.310
3 0.380 0.229 0.295
Average 8.52 2.47 0.297
St dev 0.17 0.16 0.012

TABLE 2: Summary of Critical Load, Frictional Force, and COF during the scratch test.

CONCLUSION

In this study, we conducted a simulation of the wear process of a PTFE coating for non-stick pans using the NANOVEA T50 Tribometer in linear reciprocating mode. The PTFE coating exhibited a low COF of ~0.18 the coating experienced a breakthrough at around 130 revolutions. The quantitative evaluation of the PTFE coating adhesion to the metal substrate was performed using the NANOVEA Mechanical Tester which determined the critical load of the coating adhesion failure to be ~8.5 N in this test.


The NANOVEA Tribometers offer precise and repeatable wear and friction testing capabilities using ISO and ASTM-compliant rotary and linear modes. They provide optional modules for high-temperature wear, lubrication, and tribocorrosion, all integrated into a single system. This versatility allows users to simulate real-world application environments more accurately and gain a beer understanding of the wear mechanisms and tribological properties of different materials.


The NANOVEA Mechanical Testers offer Nano, Micro, and Macro modules, each of which includes ISO and ASTM compliant indentation, scratch, and wear testing modes, providing the widest and most user-friendly range of testing capabilities available in a single system.

NOW, LET'S TALK ABOUT YOUR APPLICATION

Comment