Monthly Archives: July 2014
Here are examples of materials we tested this month:

Mechanical:
• High Temp Nanoindentation of ptfe coatings
• Nanoindentation of Al2O2 coating on silicon substrate
• Nano scratch of sapphire coatings
• Nanoindentation yield strength of pipe samples

3D Non-Contact Profilometry:
• Topography of porous polymer foam structure
• Topography of steel fracture sample
• Roughness of pharmaceutical tablets
• Volume & Depth of pcb holes
• Coplanarity of micro features
• Wear testing of simulated silicate rock samples
• Wear testing of dlc coatings at high temperature
• Wear Testing thermal spray coatings
• Wear & Friction Testing lubricated composite samples
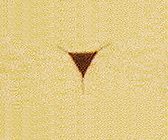
Breakthrough Indentation Yield Strength Test by Nanovea
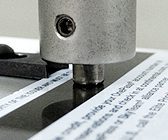
Irvine CA, July 14, 2011 – Nanovea today introduced its patent pending breakthrough method of reliably acquiring yield strength through indentation; ultimately replacing the traditional tensile testing machine for yield strength measurement. Traditionally yield strength has been tested by using a tensile testing machine, a large instrument requiring enormous strength to pull apart metal, plastic and others. The yield strength (also known as yield point) of a material in engineering (and or materials science) is the point of stress that a material starts to deform plastically. Before reaching the yield point a material will deform elastically but returns to its original shape when stress is removed. A crucial material property for nano and micro related materials found in advancing industries such as biomedical, microelectronics, energy and many others. Until now the most reliable way took large machine effort, sample preperation, and or was impossible to perform on small samples and localized areas. By using Nanovea’s Mechanical Tester in indentation mode, using a cylindrical flat tip, yield strength data can be easily obtained. For years now, the indentation test has been used for hardness and elastic modulus measurements. There has traditionally been an issue with linking macro tensile properties to what was measured during an indentation test. Many studies measuring with spherical tips have allowed stress-strain curves but were never able to give reliable tensile yield strength data that corresponded directly to macro tensile data. Nanovea’s patent pending method, using a cylindrical flat tip, gives yield strength directly comparable to what is measured by traditional means. It is believed that the load per surface area at which the cylindrical flat tip penetrates, at increased speed, is directly linked to the load versus surface area at which the material starts flowing in a tensile mode test. Therefore, reliable yield strength results on an endless list of materials, small or large has never before been as obtainable until now. “This is just another addition, on a long and growing list, of what can be tested with our Mechanical Tester,” said Pierre Leroux, Nanovea’s CEO. While this specific test is a breakthrough of great importance, it is ultimately just another reason why the Nanovea Mechanical Tester has the widest testing capability of any mechanical testing system.
For application note visit: Breakthrough Indentation Yield Strength Testing

Fracture Toughness Measurement Using Nanoindentation
In this study, the Nanovea Mechanical Tester, in Nanoindentation mode, is used to evaluate the fracture toughness of a fused silica sample. The fused silica sample was chosen for its commonly recognized fracture toughness values to display the control and accuracy using nanoindentation.

Wear Resistance of Magnetic Stripes Using Tribometer
In this application, the Nanovea Tribometer is used to simulate the wear process of the magnetic stripes on cards and measure the wear resistance and coefficient of friction in a controlled and repeatable manner.

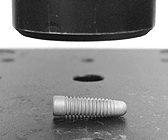
Dental Screw Dimensions Using 3D Profilometry
In this application the Nanovea ST400 Profilometer is used to measure a flat surface along with screw thread features in a single measurement on a dental screw. The surface roughness will be calculated from the flat area, and various dimensions of the thread features will be determined.


