
MS&T 2013
MS&T | October 29-30 Montreal, Quebec Canada. The MS&T partnership of ACerS, AIST, ASM, MetSoc and TMS brings together scientists, engineers, students, suppliers and more to discuss current research and technical applications, and to shape the future of materials science and technology. NACE International will co-sponsor MS&T’13. www.matscitech.org
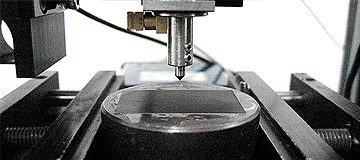
Nanomechanical Testing of Thermal Transfer Print
We must simulate the process of scratching in a controlled and monitored manner to observe sample behavior effects. In this application, the Nanovea Mechanical Tester, in nano scratch testing mode, is used to measure the nanomechanical load required to cause failure to 3 micron wax/resin prints on coated paper. A 2μm 90° cone diamond tip stylus is used at a progressive load ranging from 0.10 mN to 0.20 mN to scratch the printed surface. Points of failure will be reviewed. In addition, we have also used nanoindentation mode to obtain hardness and elastic modulus of the sample prints.
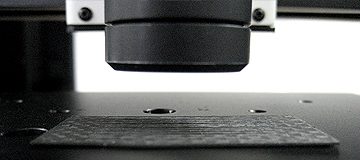
Surface Measurement Using 3D Profilometry
In this application the Nanovea ST400 Profilometer is used for surface measurement of an exposed piece of carbon fiber. The area measured was selected at random, and assumed large enough in that it could be extrapolated to make assumptions about a
much larger surface. Surface roughness, surface area, wavelength, fractal analysis and other surface parameters are used to characterize the surface.
Here are examples of materials we tested this month:

Mechanical:
• Nanoindentation of glass samples
• Nanoindentation compression of micro features
• Nanoscratch of soft films
• Nanowear of biomedical samples
• Microindentation mapping of welds

3D Non-Contact Profilometry:
• Finish of micro seals
• Texture of micro patterns
• Roughness of transparent gel films
• Flatness of glass samples
• Dimensions of lens samples
• Deposited grid Step Height measurement

Tribology:
• High Temp Wear of various spray coatings
• Friction of submerged polymer samples

NANOVEA PROUD SPONSOR OF EUROMAT
September 8-13 | Sevilla, Spain. Held every two years since 1989, the Euromat conferences gather academics and researchers from the industry with a large scope on materials science and technology and their application. The extraordinary positive evolution of the conferences in the recent editions is indicative of the materials scientist community’s excellent health.
Learn more ►Euromat 2013
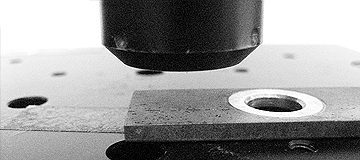
Corrosion Measurement Using 3D Profilometry
In this application the Nanovea ST400 Profilometer is used to measure the surface of a corrosion pitted stainless steel coupon. The area measured was selected at random, and assumed large enough in that it could be extrapolated to make assumptions
about a much larger surface. Density, area, volume, size and shape will be used here to quantify the level of corrosion.

ASTM G99 Tips Perspective Continuous Wear Contact
In this application, the Nanovea Tribometer is used to measure the wear rate of a 6mm diameter Stainless Steel and Tungsten Carbide ball tip; many other custom materials and or sizes can be used. The rotative wear test (ASTM G99) was used for a 1hour duration. Then a surface profile was measured using the PS50 Profilometer and micrograph was taken to evaluate surface wear loss between each ball tip for comparison.

2013 TRADESHOW CALENDAR
2013 Tradeshow Calender
TMS | March 4-6 San Antonio, TX
www.tms.org
AeroDef | March 19-21 Long Beach, CA
www.aerodefevent.com
MRS Spring | April 2-3 San Francisco, CA
www.mrs.org
ICMCTF | April 30-May 1 San Diego, CA
www2.avs.org
MS&T | October 29-30 Montreal, Quebec Canada
www.matscitech.org

NANOVEA’S MOST ADVANCED 3D PROFILOMETER EVER
Nanovea has taken the High Speed HS1000 3D Profilometer to the next optional level. In place of the standard Optical Pen the Line Sensor, in Nanoview option, has been combined with both linear and rotational staging.
SPECIFICATIONS:
Speed: 1800 “Lines” or 324,000 “Points” per second
Line Length: 1.33mmNumber of Points: 180
Spot Size: 3.6um Pitch: 7.4um
Working Distance: 5mm
Z Measurement Range: 110um
Resolution: 20nm
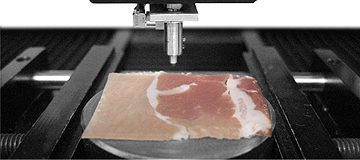
Biomechanical Hardness Evaluation of Tissue
The ability to accurately measure mechanical properties in the fields of Life Science has recently become an important aspect of many current studies. In some cases, understanding the mechanical properties of soft biological surfaces have helped uncover the mechanical effects of diseases. Understanding mechanical properties provides a context for identifying the local mechanical behavior linked to specific changes. It is also critical in the development of artificial bio-materials. In this application, the Nanovea Mechanical Tester, in Nanoindentation mode, is used to study the biomechanical hardness and elastic modulus of 3 separate areas of prosciutto (fat, light meat and dark meat).


