Surface Wear Subtraction Using 3D Profilometry
En esta aplicación, el Nanovea ST400 Profilometer is used to measure the surface wear of a golf ball before and after wearing of the surface with sandpaper. The two profile measurements were then combined through software surface subtraction to analyze wear volume loss. This feature is ideal for applications such as but not limited to: wear, corrosion and lubrication failure.
He aquí algunos ejemplos de materiales que hemos probado este mes:

Mecánica:
• Nanoindentation hardness of optical fiber
• Nanoindentation compression of plant surface
• Nanoscratch of solar thin films
• Nanoscratch of optical fiber
• Microindentation hardness of tungsten carbide
• Micro Scratch of foil coating
• Macro Scratch of wood coating

Perfilometría 3D sin contacto:
• Roughness of medical parts
• Roughness of films
• Texture consistency of molded plastic
- Acabado de piezas mecanizadas
• Depth & Area of micro scratches
• Topography & Form of spray coating
• Dimension of optical spheres
• Wear resistance of aluminum oxide coatings
• Wear testing tungsten carbide
• Wear testing chromium oxide
• Friction testing of catheter
• Friction testing of foaming liquid

Wood Coatings Wear Resistance using Tribometer
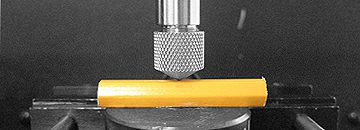
En esta aplicación, el Nanovea Tribómetro is used to measure the wear resistance of a coated wood pencil. The linear wear test (ASTM G133) was used with a 3mm stainless steal ball tip; many other tips could have been used. The 1st test was performed for 4 hours and then a 2nd test was performed for 1.5 hours. After wear testing the 3D Profilometer integrated on the Tribometer was used to profile the wear track.

Medición de la profundidad de microarañazos mediante perfilometría 3D
En esta aplicación, el Nanovea ST400 Profilometer se utiliza para medición de la profundidad de una hilera de microarañazos creados con la tecnología Comprobador mecánico en modo rayado. En segundos, el perfilómetro, con una sola pasada de línea en modo 2D, proporciona mediciones de área y profundidad.
Medición de la profundidad de microarañazos mediante perfilometría 3D
He aquí algunos ejemplos de materiales que hemos probado este mes:

Mecánica:
• Nanoindentation compression of amorphous silica
• Nanoindentation yield strength of micro wire
• Nanoindentation fracture of micro ceramic
• Nanoscratch of catheter coatings
• Microindentation puncture of thin film
• Micro Scratch of glass samples
• Macro Scratch of clear coat samples

3D sin contacto Profilometry:
• Elastomer molds roughness measurement
• Roughness of plastic electronic surfaces
• Finish of die cast samples
• Volume & Area of pitted surface
• Shape & Form of polymer samples
• Contour of micro circuit surface

Tribología:
• 12 & 24hr Wear & Friction testing of ceramic, polymer and alloy samples in synthetic bio fluid.
He aquí algunos ejemplos de materiales que hemos probado este mes:

Mecánica:
• Polymer Gel Hardness Nanoindentación DMA
• Nanoindentation yield strength of films
• Nanoindentation mapping of thermal coating
• Nanowear of biomedical coatings
• Microindentation fracture of composites
• Micro Scratch deformation of hard polymers

Perfilometría 3D sin contacto:
• Roughness of pills
• Texture of films
• Profile consistence of micro mesh
• Step height of printed circuits
• Topography of spray coatings
• Dimension of machined polymer components

Tribología:
• Friction testing of plastic tubes
• Friction testing of plastic bushings
• Friction testing of aluminum silicon alloy
• Wear rate of engine components
• Wear rate of composites

Mechanical Characterization of Organic & Non Organic Shell
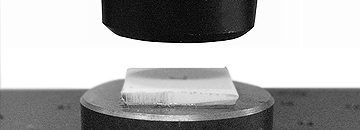
In this application, the Nanovea Mechanical Tester, in Nanoindentation mode, is used to study the mechanical characterization of an organic and a non-organic egg shell. The most critical aspect with Nanoidentation testing is securing the sample, here we took pieces of each sample and epoxy mounted leaving the edges exposed for testing.
He aquí algunos ejemplos de materiales que hemos probado este mes:

Mecánica:
• Nanoindentation of xylan coating
• Nanoindentation composite
• Nanoindentation mapping of wood
• Nanofriction of catheter
• Nano Scratch of silicon
• Micro Scratch of silicon nitride coating

Perfilometría 3D sin contacto:
• Topography of corroded steel
• Dimension of optical lens samples
• Roughness of polymer molds
• Roughness of polymer casing
• Depth of pitted aluminum
• Step height micro features
• Friction Testing of various lubricants
• Xylan coatings wear resistance
• Wear rate (high speed) of hard plastic
R&D MAGAZINE RECOGNIZING NANOVEA M3
The control loop between the piezo-electric transducer in the Nanovea M3, combined with an ultra sensitive load cell, helps ensure that the load applied is accurate and reproducible. High precision of the capacitive ring enables accurate depth measurement providing an automatic depth versus load curve with hardness and elastic modulus data meeting ASTM E2546 Nanoindentación requirements using precise motorized staging, the test is repeated quickly to deliver repeatable and accurate averaging of five tests. The Nano Module head also eliminates many of the color and texture problems associated with image recognition software. Read More R&D Magazine
Nanovea Unveils Its New Revolutionary N3 Line
Irvine CA, January 18, 2012 – Nanovea today announced the arrival of the N3 line dedicated to providing high-end measurement technology to the broader market. Nanovea has fully automated their measurement techniques while designing to price in the $20K market.
The headline of the N3 line is the M3, a breakthrough in technology that aims at two distinct aspects missing in the hardness testing market. First, the combination of three factors never before available: nanometer range, controlled load & depth and a competitive price to compete in the $20K market. This provides universities and smaller R&D units to affordable nanoindentation capability. The M3 introduces an entirely new user capability with this price range, providing affordable access too quick and easy nanoindentation results under ASTM standard. Second, is to offer next generation technology to replace the traditional Visual Micro Vickers Hardness Testers that have not changed in more than 15 years. To achieve this, the indentation method has been made fully automated with no need to visually observe the indent which eliminates user error or problems with image recognition software that may have issues with material color and texture. Also, this new technology can achieve lower load and will work on thin coatings and all ranges of materials including ceramics, polymers, metals and others. The fully automated system has a touch screen start that gives automatic average of multiple measurements in minutes. The unit is compact and fully contained with only one standard electrical cable to connect. Because of these advancements in technology and the very competitive price, the M3 line will be the replacement of choice for older Micro Vickers Tester currently used in industrial high throughput quality control environments.
The M3 ushers in a new era of hardness testing by providing measurement capability that until this point targeted very specifically high end research. Essentially, like most technological advancements, price has kept nanoindentación capability out of the reach of the broader market still using standard hardness testing equipment. The M3 will be a significant replacement at an affordable cost and the result will be revolutionary. But Nanovea didn’t stop there. The M3 is only one of three new products from Nanovea’s new N3 line. Along with the M3 Nanovea also introduces the P3 and the T3.
The P3 is a significant advancement with 3D non contact metrology, providing automatic nanometer ISO roughness and step data on nearly any material; a capability unavailable in the 20k market. The P3 will provide to a broader market in need of automatic nano through macro roughness data without the high cost associated with a complete Profilometer system. And last but not least, the T3, like the P3 was developed to provide quick, easy and affordable access to high end measurement capability. The T3 is an automatic nano wear tester using linear reciprocating, ASTM g133, for wear rate study.
“The N3 line is a revolution of high end material measurement instruments, each in their own way and in their own markets. Each has been strategically designed to follow Nanovea’s goal to provide crucial nanotechnology to the broader market. As with many technologies being developed today to advance our society, price will ultimately control broad acceptance and use. It is no different with measurement technology and is just as crucial if not more.” said Pierre Leroux, Nanovea’s CEO.
Nanovea will be releasing the N3 line for the first time publicly at the Fall 2012 MRS show. Purchase orders for the N3 line begin in April for delivery in June 2012.


